Wall Paneling Kits

Wall paneling kits have become a practical option for anyone looking to give a space a fresh update without a big, messy renovation. These kits bundle up everything you need: precisely cut panels, fixings, adhesives, and straightforward instructions. That means you can pull off a professional look on your own, minus the need to hire a carpenter. If you ever wanted to add character, texture, or a splash of colour in a way that’s less permanent than paint, wall paneling is definitely worth checking out.

Why Use Wall Paneling Kits?

Wall paneling kits are a real win for DIY projects since you get everything in one box. There’s something reassuring about getting panels pre-cut to fit your wall dimensions, saving you a ton of time and eliminating awkward angle calculations. Most packages also include the right tools, fixings, and adhesives. If you’re experienced with saws or want more customization, some kits let you cut panels to size yourself. Homes with uneven walls or many electrical outlets often benefit from kits you can trim for a tailored fit.

But paneling isn’t just about quick updates for style. It can totally change the mood of a room and add both visual and tactile interest. With panels, you can play around with colour by painting or wallpapering only the panels, instead of the full wall. That makes them perfect for renters or anyone who likes to switch up their look often. Plus, the added texture makes the whole space feel more lively and welcoming.

Types of Wall Paneling and Where They Shine

Wall paneling comes in many different styles, each bringing its own personality and practical perks. Here are some of the most popular types, along with suggestions on where to use them.

Tongue and Groove Panels

Tongue and groove panels have interlocking edges, which makes installation a breeze and results in a tidy finish. These panels can be moisture-resistant with the right material, which makes them great for kitchens, laundry rooms, or bathrooms. They create a cozy, slightly coastal feel, and the shadows between the boards give subtle depth. The look is classic, yet keeps a space from feeling too sterile.

Shiplap Panels

Shiplap originally came from shipbuilding, but now it’s a staple in rustic barnstyle interiors, like charming Cornish cottages with those welcoming, horizontal lines. Shiplap panels overlap, which helps with insulation and creates nice shadow lines. The style works well in bathrooms, entryways, or really any room where you want a warm, chill vibe without extra fuss.

Wainscoting

Wainscoting covers the lower third of a wall and was once seen mostly in English cottages and old homes. It’s excellent for protecting against scuffs and adding a touch of timeless charm to hallways, dining rooms, and spaces that need a simple but classy upgrade. Modern kits make installation less intimidating—you don’t have to be a woodworker to get it right.

Slat Wall Panels

Slat wall panels have grown super popular for feature walls and accent areas. The individual slats can be spaced or set right next to each other, depending on your taste. Slat walls work well as focal points behind TVs or beds, and in bathrooms where you want a restorative, spa-like mood. Slat panels look amazing when paired with clever lighting, such as uplights or LEDs behind the slats—this brings out dramatic shadows and next-level cool effects.

Beadboard

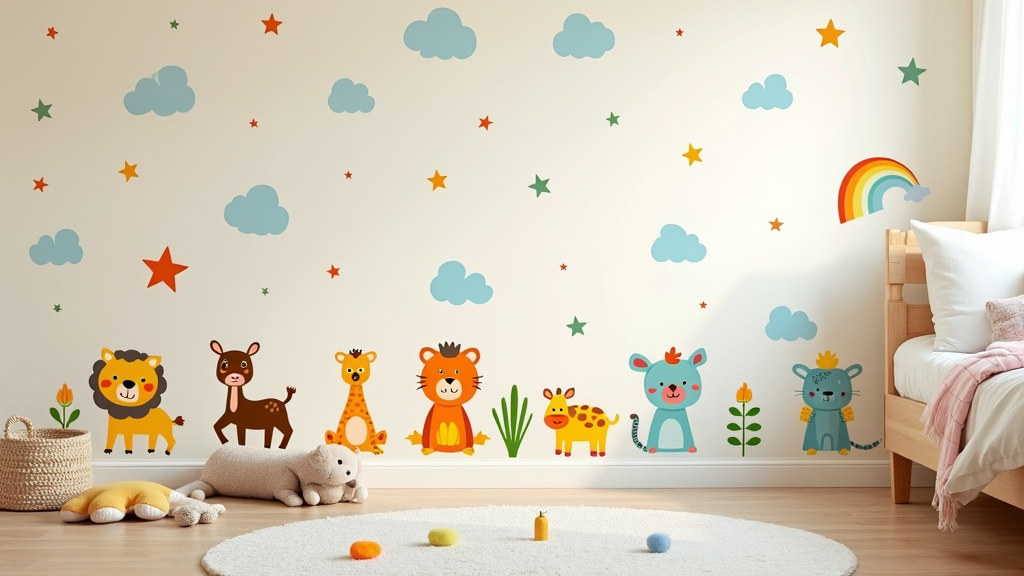
Beadboard is a classic if you want a timeless cottage feel. The vertical lines make walls look taller, helping small rooms or nurseries look more spacious. Beadboard is great with mural decals or bold colours, especially in children’s rooms where you want something playful but easy to update later as interests change.

Board and Batten Paneling

Board and batten is all about simple drama: thin battens attached over the seams of wider boards for a geometric, repeating effect. It works beautifully in everything from modern lofts to traditional living rooms. DIYers will appreciate kits that include battens and suggest possible layouts, making the transformation straightforward. The look is bold, yet easy to achieve when everything’s in one package.

Geometric Wall Panels

For a more modern edge, geometric wall panels let your wall double as artwork. Precut shapes—hexagons, triangles, or custom patterns—let you create unique styles, from symmetrical designs to a more random, playful effect. Many kits even give you layout guides and all pieces needed. This option is perfect if you want to bring in fresh color and dimension without changing the whole wall.

Dado Rails

Just adding a simple dado rail horizontally across a room can completely transform how it feels. Dado rails visually divide the wall, making it easy to use two different colours or materials together. They’re an ideal touch for stairways, hallways, and living rooms, lending subtle architectural detail. Kits offer an easy install: just measure, stick in place, and use a level to ensure everything lines up. It’s a small step, but gives your space a more finished look.

How to Choose the Right Wall Paneling Kit

Deciding which paneling kit to buy really comes down to your goals. Are you after a quick refresh or a head-to-toe transformation? Some kits have everything measured and precut, including trims and fixings, so you can get right to work. Others provide larger boards or slats for you to cut and customize—perfect if your walls aren’t standard sized or you have lots of doorways and obstacles. If you’re newer to home improvement or want to minimize mistakes, full kits give you a confidence boost and limit wasted materials.

For eco-friendly choices, look for kits made from responsibly sourced wood or recycled materials, especially among MDF options. Paintable panels offer flexibility for anyone who loves to redecorate, while prefinished kits are great if you want minimal mess and no paint fumes. If you care about indoor air quality, doublecheck the adhesives and finishes. Some modern paneling products come with lowVOC certifications.

Installation: What to Expect

Most wall panel kits ship with easy-to-follow instructions, making setup smooth even for beginners. Typically, you’ll start by prepping the wall—removing old wallpaper, cleaning thoroughly, and perhaps lightly sanding so everything sticks better. For customfit panels, measure and mark everything before gluing or nailing. Simpler, precut kits just require you to stick up each panel, check your level, and finish the seams with trim or tidy up with caulk. Always let adhesives dry completely before disturbing the panels, so they stay secure longterm.

Usual tools include a measuring tape, level, handsaw or panel saw (if your kit requires cuts), strong adhesive, and caulk to tidy up joints. If you’re working with screws or nails, a basic electric drill or nail gun speeds things along. If you need to cut panels, safety goggles and a dust mask are always a good idea.

Adding Style: Colour, Texture, and Light

Wall panels give you the chance to make a big style impact without permanent changes. You can paint the panels any shade, add bold accents, or use wallpaper between the panels for a custom effect. Some people like to change panels or their decoration seasonally—going for warm, cozy colours in the winter and brighter pastels in spring or summer. The best thing about paneling is its texture. Slats and grooves catch changing light, so the mood of the room shifts throughout the day. For extra drama, install LED strips or indirect lighting to make the patterns really pop and add a modern touch.

The Pros and Cons of Wall Paneling

Paneling brings lots of perks: it’s easy to install, can quickly refresh or upgrade a room, and skips the messy work of plastering or painting an entire wall. It hides imperfections, cracks, or old wiring, and in many cases, the panels can be removed without much fuss if you want to go back to basics. Thicker panels or real wood styles even add a bit of insulation, while all types act as handy protectors for hightraffic spaces.

There are a few drawbacks to keep in mind. Panels do take up a small amount of floor area since they stick out from the wall. Budget kits might scratch or dent more easily than solid wood styles. The best kits—usually real wood or specialty designs—can be pricier. If paneling is installed incorrectly, you may see gaps, warping, or lifting later on, so careful prep is important. Moisture can cause trouble in bathrooms or kitchens; be sure to pick waterresistant MDF or PVC for those areas to head off issues like swelling or rot.

Frequently Asked Questions

Wall paneling is among the simplest ways to add style at home, but lots of questions come up, especially around cost, practicality, and installation.

What is the cheapest way to panel a wall?
Using MDF or plywood cut to size at your local store tends to be the most budgetfriendly option. You can buy the raw panels and cut them at home, or bring your exact measurements for in-store cutting. Stick-on panel kits made from lightweight PVC or MDF are another wallet-friendly pick—they’re easy to attach and you can paint them any colour.


Is it cheaper to do drywall or paneling?
Drywall is generally a little less expensive per square meter, but that can quickly change if you need to pay for finishing, sanding, and painting. It’s also more labor-intensive and time-consuming. Wall paneling kits, on the other hand, can save you both time and labor costs, especially on small feature walls or when you’re handling the work yourself. They’re less messy and easier to replace or remove if you want a new look later.


What is paneling on walls called?
It’s typically just called “wall paneling,” although each style has a specific name: shiplap, wainscoting, beadboard, board and batten, slat wall, or geometric panels. Manufacturers and stores will use these style names to describe their product options, so it’s easy to pick the one that catches your eye.


What are the disadvantages of wall panels?
The main negatives are that budget panels can be easily scratched or dented compared to solid wood. Poor installation can result in panels coming loose or gaps showing. In very moist spaces, using the wrong material might lead to mold or water damage. Panels take up a little room, which can make tight spaces seem even smaller.


Eye-Catching Features That Make Wall Paneling Worth Considering

  • Quick Transformation: Instantly brings personality, pattern, or texture. Ideal for home stagers or busy DIYers.
  • Simple to Install: Most kits pack in tools and clear instructions, making life easier for renters or anyone after quick changes.
  • Flexible Styling: Works with every style—minimalist, rustic, classic, or modern. Mix up colours or experiment with patterns for more excitement.
  • Room Tweaks: Vertical panels can make ceilings seem higher; horizontal boards stretch the look of a room side-to-side.
  • Wall Protection: Perfect for shielding tired plaster, covering imperfections, or toughening up walls in high-traffic areas.
  • Texture and Light: Brings visual interest and plays up changes in daylight, for a lively, inviting look from morning to night.

Wall paneling kits give you plenty of room to try different looks and boost your space with minimal effort. Whether you’re chasing a cozy cottage style, want a feature wall with a modern slant, or just need something practical that goes up fast, there’s a kit that’ll get the job done. Bottom line: It’s a fun, practical, and eye-catching way to change the feel of your home—no sledgehammer required.

About Me

Hi there! I’m Elizabeth, the creative spirit behind Trade Wife Style. You might be wondering how this all got started. Well, I’ve always had a knack for home decor, and when you mix that with our love for craft projects, a lot of what you see here comes to life! My blog is a perfect blend of my favorite DIY home decor ideas where creativity meets everyday practicality.

I think a mention of my very skillful better half is appropriate, he is on hand when i need him, being an excellent bathroom fitter he has been the one who can keep me cool in more challenging projects.

Choosing DIY home decor as my niche wasn’t just a business move for me—it’s a lifestyle. I thrive on the challenge of transforming spaces with hands-on creativity, and it’s this passion that I love to share with you all.

Balancing being a busy mum of two lively children from Lancashire and pouring my heart into my DIY projects is a beautiful chaos I wouldn’t trade for the world. My day-to-day life revolves around homeschooling, outdoor adventures, and bonding with my family, all while crafting decor solutions that inspire others to see the potential in their own homes.

This blog offers more than just pretty pictures; it’s a collection of ideas that wear a bit of my heart on their sleeve. From organic linens to non-toxic paints, each project reflects my commitment to sustainable choices.

As we journey into the next section, let me share more about life in Lancashire and how every family moment enriches my creativity and inspires each unique DIY piece I craft.

The Heart and Home of Lancashire: Family & Inspiration

Living in Lancashire is a constant source of inspiration for my DIY projects. The lush countryside and vibrant seasons serve as a perfect backdrop for raising my two spirited children, and every day brings a new adventure.

Home education is a big part of our lives. It allows us the flexibility to enjoy each day to the fullest—whether that means hitting the local nature trails or cozying up at home with a good book.

Our family embraces the beauty of living simply and staying grounded. We love spending our weekends crafting together, creating anything from homemade candles to upcycled furniture, giving each piece a personal touch and story.

Nature is our playground and teacher. The plants, rivers, and forests of Lancashire aren’t just beautiful; they practical tools in our lives. They often inspire the materials and techniques I use in my DIY creations.

The natural world’s beauty often guides my choice of materials and approaches when I tackle new home decor projects. This personal touch helps create spaces that not only look good but feel harmonious with our environment.

Now, let’s turn to my personal canvas—the home—and explore how my passion for sustainable, nature-inspired creativity translates into the DIY world.

Nature-Inspired Creativity: My DIY Passion

Nature has always been at the heart of my creative journey. Whether it’s sourcing non-toxic paint or picking out some wonderfully organic linen, incorporating natural alternatives is just a part of who I am. It’s also the essence of what I aim to achieve with each piece of home decor that I create.

My favorite materials are those that honor and respect our environment. I’m particularly drawn to sustainable sources, and every DIY project reflects this personal norm. Choosing eco-friendly options isn’t just a trend for me—it’s a lifestyle choice that adds meaning to my craft and offers peace of mind.

When I embark on a new project, it’s not just about the finished product—it’s the process that counts. There’s an authentic joy in deciding every detail, nurturing an idea from conception to completion, especially with a good podcast accompanying the experience.

Each new endeavor offers a challenge and an opportunity to immerse myself fully, creating something both practical and beautiful. It’s my little retreat amidst the lively rhythm of family life.

So that’s a glimpse into how my DIY passion and love for nature find expression in everything I do at Trade Wife Style. It’s a blend of family, creativity, and the joy of making spaces truly one’s own. I hope you’ll find inspiration for your own home and garden adventures here.

Children’s Bedroom Decals

Children’s bedroom decals have a fun way of injecting new energy into any space. Whether you’re setting up a nursery for a new arrival or giving an older kid’s room a glow up, these stick-on designs bring character, colour, and loads of personality. If you’re hoping to personalize a room without risking permanent paint or a huge effort, you’ll probably find wall decals especially handy for making a real difference—without the mess or fuss.

Colorful children's bedroom with playful wall decals of animals, stars, and clouds on a light wall, surrounded by a cozy bed and soft toys.

Why Wall Decals Are a Top Pick for Children’s Bedrooms

Kids’ bedroom decals have become a popular choice among parents and decorators, and it’s easy to see why. They instantly brighten up plain walls and turn a basic bedroom into a playful, imaginative area. I’ve witnessed bedrooms go from bland to magical in less than an hour, just by adding some colorful decals.

I also appreciate how wall decals take a gentle approach to decorating. There’s no need for drilling holes, wrestling with wallpaper paste, or trying to line up paint stencils. They’re also removable, which means I can switch things up every year as my kid’s tastes move from dinosaurs to planets, or when we decide to swap rooms. The process is simple: peel, stick, and step back to admire the transformation.

Safe and Non-Toxic: Putting Parents’ Minds at Ease

Whenever I shop for anything intended for a child’s room, safety and materials are top priorities. These days, many wall decals are made from non-toxic vinyl or fabric, and they’re free from potentially harmful chemicals like phthalates and lead. You can usually spot this info in the product descriptions or on packaging—always worth checking before you buy.

Choosing non-toxic decals means less worry if curious little hands touch—or, let’s be real, sometimes try to chew—a wall sticker. I recommend looking for decals labeled as safe around kids and infants, and picking options that are easy to wipe clean without peeling or smudging.

No-Fuss Installation & Wall Friendly Removal

Installing children’s wall decals is about as straightforward as decorating gets. Just clean the wall, peel off the backing paper, firmly smooth the decal onto the wall, and it’s done. Some brands even let you reposition decals a couple of times before they settle, so there’s a little wiggle room to get your arrangement just right.

The best part is how decals can be removed without damage when you want to change them out. Good quality decals come off in one piece and won’t pull up your paint or leave a sticky mess behind, so you can easily change themes as kids grow or try out seasonal updates.

Creative Themes to Match Any Imagination

One thing I truly love about kids’ wall decals is the massive variety of themes they offer. From sweet nurseries to bold big kid rooms, there’s a style to match every unique taste. Here are some themes I see trending almost everywhere:

  • Whimsical & Fantasy: Think dreamy clouds, rainbows, friendly monsters, and magical unicorns. These wall stickers spark creativity and transform rooms into make believe worlds.
  • Animals & Nature: Cute creatures like woodland animals, sea life, or safari favorites are classics. Butterfly and dinosaur decals are also a hit, perfect for animal-loving kids.
  • Girly & Elegant: Delicate florals, pastel castles, fairy princesses, or sparkling stars. These add a touch of charm, especially when paired with soft bedding and cozy pillows.
  • Nursery Classics: Soft coloured clouds, moon and stars, sleepy bears, or alphabet letters. These soothing and simple designs work beautifully in newborn bedrooms or nurseries for a calming effect.
  • Bright & Educational: Alphabet and number decals, world maps, or geometric shapes help turn walls into playful learning spaces. Multilingual stickers can even introduce new languages in a fun, visual way.

Mixing and matching themed packs helps you build a space that’s unique to your child, and truly reflects their interests and dreams. If your kids like both outer space and animals, blend stars and rocket ships with playful lions or teddy bears for a personal touch.

Affordable Changes with a Big Impact

When I’m planning any home upgrades, budget is always front and center. Wall decals offer a way to get a designer, custom look for just a fraction of what murals or wallpaper might cost. A few sheets of high quality stickers are usually less expensive than a single trip to a theme park, and they’ll keep the room looking great for months—or even years—depending on how often your child wants a new look.

The fact that decals are so easy to change means there’s no stress if your kid’s taste changes from cars to astronauts. I’ve even reused leftover stickers on furniture, in playrooms, or for DIY crafts on folders and boxes, getting more value out of each pack. This flexibility makes wall decals a cost effective and creative choice for families.

Choosing the Best Decals for Your Child’s Room

With so many choices out there, I use a few simple tips to pick the right wall decals for children’s bedrooms:

  • Stick with non-toxic, phthalate free materials for safety.
  • Double check that the decals are removable and promised not to damage paint or walls.
  • Read reviews to learn how the decals hold up in real homes—especially if you expect sticky fingers, frequent cleaning, or repositioning.
  • Get the right size and color palette for your space; large decals can make a big splash, while smaller ones are nice for accenting corners or bookshelf nooks.
  • Let your child help pick a theme or design if they’re old enough, since they’ll take more pride in a space they helped decorate.

By bringing your child into the process, the end result usually shines with more personality and excitement.

Common Hiccups & How to Avoid Them

Most wall decals go up easily, but keeping a few things in mind can save you from frustration:

  • Wall Surface: Decals adhere best on clean, smooth, and dry surfaces. Freshly painted walls need a few weeks to fully cure, while textured walls or brick may not hold decals as securely.
  • Temperature: Apply decals in a warm and dry room for best adhesion. Cold or humid environments may make stickers bubble or peel sooner than you’d like.
  • Layout Planning: While some decals are repositionable, moving them too much can cause stretching. Planning your layout in advance by placing the backing against the wall with tape as a guide works well.

Caring for Your Decals

To keep wall decals looking bright and crisp, gently wipe them with a damp, soapy sponge as needed. Avoid using harsh chemicals or scrubbing, since that can dull the colors or cause edges to curl up. If a decal edge lifts up after a long spell or a deep cleaning, a gentle press with your fingertips is often all it needs to stick again.

Make sure to check periodically for bubbling or dirt, especially if you live in a humid area—catching it early helps the stickers stay put for longer.

Advanced Decorating Ideas

If you want to get especially creative with children’s bedroom decals, check out a few ideas I’ve tried and loved:

  • Frame beds or reading nooks with a sky of stars or a cloud cluster for instant cozy vibes.
  • Pile on different themed packs to make mural-like scenes—think jungle adventure mixed with alphabet animals, or undersea worlds with numbers and shapes.
  • Use bigger decals as a main focal point above the bed, and dot smaller designs around doors, drawers, or shelves for playful details.
  • Blend decals with string lights or glowing stars to warm up the space, especially during bedtime.
  • Let toddlers “decorate” a small section themselves by placing easy-to-move smaller stickers at their height, giving them a sense of control and pride in their space.

The creative possibilities are almost endless, and kids usually have the best ideas for making their space feel like their own.

Frequently Asked Questions About Children’s Wall Decals

Are wall decals safe for babies’ and kids’ rooms?
Most high quality decals are non-toxic and BPA free, meant to be safe for nurseries. I always check labeling, or if in doubt, ask the seller directly for safety info.


What’s the best way to remove wall decals without damaging paint?
Peel slowly from a corner and if any part is stubborn, a little heat from a hairdryer helps. Good decals should come off easily, leaving your wall looking the same as before.


Can I apply decals to any type of wall?
Decals stick best to smooth, flat, painted surfaces. Very rough, textured, or porous walls such as brick or cement are usually tricky for decals to hold onto properly.


Will wall decals last through daily touching or cleaning?
If applied properly, good decals typically last several years. Gentle cleaning will keep them looking sharp and colorful for longer.


Bringing Color and Joy to Kids’ Spaces

Children’s bedroom decals turn regular rooms into places that spark creativity, joy, and a sense of control for kids. Since they’re safe, easy to use, budget friendly, and removable, they’re my favorite go-to for refreshing a kid’s room with little hassle or risk. Choosing the right wall decals together, then watching the space come alive and your child’s excitement grow, never gets old. Whether you want animals, stars, letters, or fairy tales, there’s something out there for every style. Time to let the creativity shine and help your child’s room feel truly special!

Welcome to Your “Premium” Website!

Welcome to your Premium Level Website!

YES! You’ve done it. Your new website is up and running, and this is the platform from where you’re going to launch and build out your online business venture.

Wealthy Affiliate is no ordinary platform. Here, we strive to turn YOU into our next success story. We equip you with the tools, the skills, and most importantly, the mindset you’ll need to thrive in the challenging yet rewarding world of affiliate marketing.

Now, let’s talk about your new website. 

This isn’t just a website. It’s your “ticket” to a world filled with possibilities. No matter what niche you choose for this website, it is the launchpad for your passion, your ideas, and your business aspirations.  

It is the platform where you are going to be able to help people, to engage with your audience, and ultimately to generate revenue through many different business models. 

Remember, your journey doesn’t stop here…this is really just the start of the fun.

The 4-Steps to Success with Your Wealthy Affiliate Website

The first thing we want to do is break down a success strategy into a digestible, effective path.  People tend to “overthink” the process, which actually leads to less success, not more. 

So here are the four, simple steps that you are going to be learning within the initial “core training” at Wealthy Affiliate to turn you raw website into a profitable venture. 

  • Step One: Choose Your Niche (DONE).  Decision time. Think about what you love, what interests you, and what you can help others learn or discover. Your niche is the corner of the internet where you’ll thrive. It’s the special flavor that sets your site apart from the crowd. You have already chosen your niche, but know that your niche can be changed at any point, and through time you are likely going to be involved in many different niches online!
  • Step Two: Build and Rank Content. This is where the magic happens. Your focus as you build your website is going to be helping your audience, sharing stories, and creating engaging content. This is where ranking comes into play. It’s all about making your content easy for search engines to find and love. So roll up your sleeves and get ready to learn the latest SEO strategies with Wealthy Affiliate (and use the tools within your membership to help you with that).
  • Step Three: Get Traffic. The next stop, traffic. The more visitors you have to your site, the better. It’s simple math. Increased site traffic equals increased visibility, which equals increased potential for profit. As your website starts to rank in search engines, and as you start to implement social media strategies taught here at WA, you are going to see your traffic start to take off.
  • Step Four: Make Money. The moment we’ve all been waiting for – PROFIT. This is where you’ll be adding affiliate links to your website, and start earning money every time a purchase is made through these links. Here’s an example: visit: https://www.wealthyaffiliate.com?a_aid=YOURID …and see how you can incorporate such links to monetize your site. You are automatically approved for the affiliate program here at WA, and you can share that affiliate link at any time and earn recurring revenue when someone joins and upgrades.  There are people here within the community earning 6 figures simply sharing their WA affiliate link on their websites. 

Step by step, we’ll be growing together on this journey. So keep pushing forward, keep learning, and remember – your success is our success. As you move through the core training and working within your Business Hub, you will be guided through this process and building out your website with success in mind.

The Power Wealthy Affiliate for YOUR Business Efficiency

More efficiency leads to more productivity.  More productivity leads to more opportunity.  That is the focus of our training, and our technology, and the platforms that you have available to you within WA. 

You are unlocking “ultra efficiency” by harnessing the Business Hubs platform at Wealthy Affiliate. This is your key to managing and expanding your business with ease and proficiency. The platform’s seamless navigation and intuitive interfaces unleash a new level of control as well as flexibility.

Your Wealthy Affiliate website is backed by our state of the art, “in house” Managed WordPress Hosting.  We lead the industry leader in speed, security, and reliability. The platform’s sophisticated technologies guarantee your website’s performance. NO space for lag, error, or threat!

You now have access to an array of over 5,000+ theme designs and 60,000 plugin theme extensions await you…not to mention key to the community, platforms, and mentorship within WA. 

As an added bonus, you get a FREE domain (and TWO free domains with Premium Plus+) upon upgrading, so you can now get your website over to your own brand (if it isn’t already). Remember, have a domain on your own brand, allows you to start to rank in search engines like Google. Also, all affiliate programs now require you to have your own domain for approval.  So it is requisite for making money online.  

Your journey at Wealthy Affiliate doesn’t or with your brand doesn’t stop here. It’s JUST THE BEGINNING.  It is a breeding ground for a long-term and very successful online business!